
Tiny Kitten in a Box

O que você precisa:
~ Restos de lã - preto, branco e claro e escuro de uma cor de sua escolha - Eu vou chamá-lo de azul durante todo o tutorial
~ Restos de lã - preto, branco e claro e escuro de uma cor de sua escolha - Eu vou chamá-lo de azul durante todo o tutorial
~ Thread (eu usei branco para tudo!)
~ Papel tissue
~ Lápis
~ Finamente apontado tesoura
~ Calcador de movimento livre (opcional, mas altamente recomendado!)
~ Pequena quantidade de recheio fiberfill
~ Padrão - clique AQUI! (Pág. 1 gato = pg 2 caixa =)
Por favor, leia o tutorial completo antes de começar - as instruções de corte fará com muito mais sentido assim!
~ Calcador de movimento livre (opcional, mas altamente recomendado!)
~ Pequena quantidade de recheio fiberfill
~ Padrão - clique AQUI! (Pág. 1 gato = pg 2 caixa =)
Por favor, leia o tutorial completo antes de começar - as instruções de corte fará com muito mais sentido assim!
 PRIMEIRO PASSO: Com um lápis, trace o padrão em seu papel de seda. Pára com isso, deixando cerca de um centímetro em todo o perímetro.
SEGUNDA ETAPA: Cortar sua lã.
Importante: Certifique-se o trecho de seu velo executado da esquerda para a direita!
Você vai precisar de:
Dois retângulos de azul do mesmo tamanho que o seu padrão de papel tissue
Um retângulo azul escuro grande o suficiente para cobrir a largura do seu padrão mais a altura das faixas
(Você não precisa de medir -. Globo ocular e pique Se tudo isso falhar, cortar todas as suas peças do mesmo tamanho que o seu padrão!)
(Você não precisa de medir -. Globo ocular e pique Se tudo isso falhar, cortar todas as suas peças do mesmo tamanho que o seu padrão!)
 PASSO TRÊS: Camada da seguinte forma:
Coloque uma luz azul do lado direito do retângulo DOWN. Coloque o papel de tecido em cima. Levante-lo e colocar o retângulo branco sobre a área onde os olhos eo nariz será, em seguida, colocá-lo de volta para baixo de modo que o branco está no fundo e papel de seda está no topo.
 Tal como este!
 QUARTA ETAPA: Costure ao redor dos olhos e as bochechas / queixo. Eu uso o meu pé de movimento livre para isso, mas se você não tiver um, pode fazer a agulha para baixo, levante-o-pé-e-volta manobra.
 Aqui está o que ele vai ficar no outro lado.
 PASSO CINCO: Usando uma tesoura, apare cuidadosamente o excesso de velo de distância em torno de sua linhas de costura.
 PASSO SEIS: Camada de seu retângulo preto sobre os olhos e nariz.
 Flip tudo para o lado de modelo e costure a volta dos alunos e do nariz.
 Corte fora o excesso.
 PASSO SETE: Camada de seu retângulo azul escuro sobre a área de distribuição do rectângulo azul claro. Novamente, certifique-se o trecho de seu velo corre da esquerda para a direita.
 Etapa oito: Vire e costurar as linhas de distribuição. Apare o excesso de lã.
 Etapa nove: Camada de seu retângulo segunda luz azul em cima de sua cara gatinho, entre os lados direito juntos.
 Vire e costurar sobre a linha, deixando cerca de dois centímetros na parte inferior aberta para virar e encher.
 TEN STEP: Jogue fora o máximo de papel de seda que você gostaria de - não importa se é perfeito, porque tudo vai se esconder no interior!
 ONZE PASSO: Trim perto de sua linha de costura em toda a volta, excepto na abertura inferior, como mostrado.
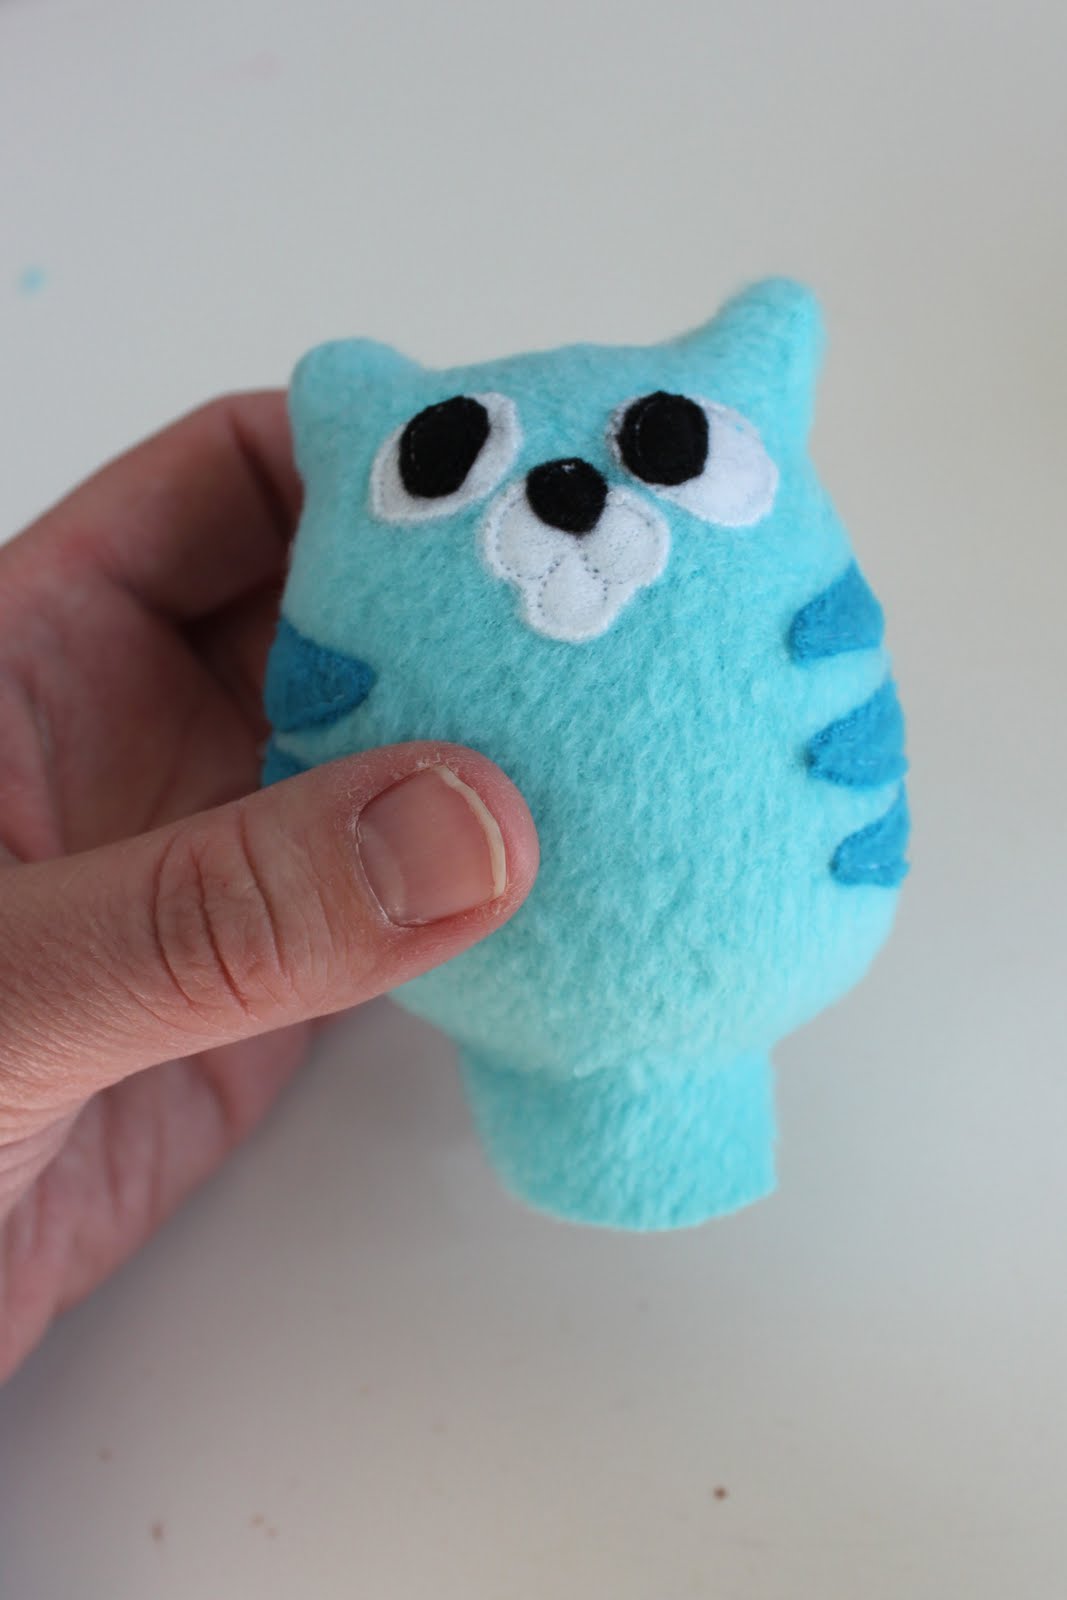 Passo Doze: Transforme o seu gatinho para fora do lado direito, com cuidado cutucando os ouvidos com um objeto pontiagudo. Coisas dela!
 DÉCIMO TERCEIRO PASSO: Cuidadosamente poke valores de costura do interior de abertura e de mão costure o buraco fechado. (Olha o que aconteceu com minha agulha, aparentemente, muito fraco eu estava puxando-o, e - bum!)
 Voila! Um gatinho bonitinho!
Você pode definitivamente ser criativo com as cores. Olhe para estes gatinhos pedido especial que fiz para minhas sobrinhas e sobrinho:
 É definitivamente um trabalho extra para dar-lhes os olhos coloridos e narizes-de-rosa, mas eles simplesmente se saem tão bonito assim!
 O padrão de caixa está na página 2 do arquivo padrão. Eu tentei alguns tipos de cartão, mas o papelão de uma caixa de pizza foi definitivamente a melhor escala.
Boa sorte com seus gatinhos!
Se você fizer um! poste e partilhe no fb >'.'<
________________________________________________
Sleeping Bags TUTORIAL
 This past weekend my husband took the boys on a final summer campout before school starts. They were so excited! In preparation, they wanted to play that some of our little critters were going camping. But what campout would be complete without itty bitty sleeping bags for their tiny stuffed friends to sleep in?
These little sleeping bags are finished at about 3" wide x 4 1/2" tall. They are fully lined -- but don't let that scare you! It's not as hard as you might think!
They are SO cute, and the perfect size for little stuffed pets (ours are Whimzy Pets -- they have lots of space inside the sleeping bags at their feet), GI Joes, Kelly dolls, or even Lil Bratz dolls (if anyone still has those kicking around!).
 What you need:
Four 3.25"x5" rectangles (two for lining -- mine are green, two for shell -- mine are pink)
One 7" zipper
 STEP ONE: Open your zipper, and lay one side right sides together with the long edge of one of your shell (outer!) rectangles. The teeth of the zipper should be toward the inside of your rectangle.
 STEP TWO: Sew, using a scant 1/4" seam allowance. Gently curve your zipper around the bottom right corner of your rectangle, as shown. (I made three of these, and used the zipper foot on only one of them. You can do it without.)
 STEP THREE: Carefully trim away the excess fabric from the corner. You will use this as a pattern for cutting your other rectangles, so be careful to keep it in one piece.
 STEP FOUR: Layer your little leftover corner on top of your other rectangles and trim them to match.
NOTE: I used fabric that was the same on both sides. If you are using a fabric that is printed on one side, be sure to trim the correct corners so you end up with mirrored pieces!
 STEP FIVE: Lay your other shell rectangle alongside the first, and line up the placement of the zipper to match the first side.
 STEP SIX: Sew it on!
 STEP SEVEN: Time to attach the lining. Don't be scared!
Lay your little sleeping bag zipper side up. Take one lining rectangle and layer it on top, so the zipper is sandwiched in between. (Pin if you are concerned about them staying lined up correctly -- although I admit I didn't bother.)
 STEP EIGHT: FLIP IT OVER so that the shell side is on TOP. (This way you can follow your previous stitching line exactly.) Sew! Repeat for other side.
 Here it is flipped right side out. Doesn't that zipper look perfect in there??
 STEP NINE: Fold your sleeping bag together, and zip it an inch or so at the bottom, stopping a little before the curve. Pull the shell pieces out of the way. We are going to start by sewing the lining, right sides together.
 Sew, using a 1/4" seam allowance. Stop about 1/4" before you hit the zipper tape.
 STEP TEN: Flip your little sleeping bag around and layer the shell pieces right sides together. Sew, starting at the top edge. When you get down near the zipper, fold the zipper RIGHT SIDES TOGETHER and sew right over it, sewing backwards and forwards over it a few times for extra security. Then meet up with your previous stitching on the lining and backstitch.
 STEP ELEVEN: All that's left is the top edge! Unzip your sleeping bag completely. Fold the top edge of the shell down about 3/8". Tuck the zipper ends inside as shown.
 Fold the lining up inside to match the the shell. I folded my lining over the top of my little zipper ends as well, to hide them completely. Pin in place and topstitch a scant 1/4" from the folded edge.
 Done!
Done!So little and cute with its contrasting lining and zipper!
 The little pets had a fantastic time on their campout. They went boating in their tiny boat, fished for tiny fish...
 ...had a tiny campfire, drank tiny hot cocoa (borrowed from my Barbies), and slept in their tiny tent!
made by: obsessivelystitching


Nenhum comentário:
Postar um comentário